I recently made a Tardis cake for my son’s birthday. This is a guide on how I did it, what went wrong and what I think I should have done to make it right. If I am ever tempted to do it again, I will be more prepared!
The Beginning
I made lots of 8 inch square cakes. This was the first mistake, I should have made less, smaller, thicker cakes, but we live and learn. Then I did some research to see how other people had made Tardis cakes. There is a lot of variety out there, from the barely recognisable blue blobs (cute but messy!) to the amazingly professional looking ones with lights! There was also the option of the 2D flat cake, but I wanted a proper 3D standing up one.
The observant among you will notice that I did the research after making the cakes, another slight error!
Getting Started
I decided that the best idea was to make 4 sides out of roll-out icing, let them dry and stick them on a cake. I knew that if the sides were put on while soft they would collapse.
 I found a plan for a Tardis model and used this to loosely calculate the hight/width ratio for the sides of the Tardis. I then drew it out on paper in black marker so I could see it through greaseproof paper and used this as a guide to cutting out. I had finally started!
 Next I got some white icing and coloured it using paste colours. I didn’t think I’d be able to buy ready coloured ‘Tardis blue’ icing, but it was very difficult to get a good colour. Then I went shopping and found some Tardis coloured roll-out icing! I used a 16MB compact flash card covered in cling film to make the indentations for the windows in the icing while it was still soft.
Cakes
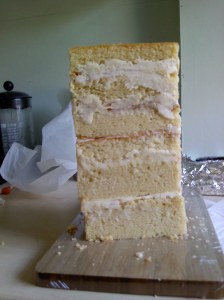 The cakes were already made and frozen, one thing I do know is that cakes are easier to cut to shape when frozen. I cut them into 14cm squares and stacked them together with butter icing.
For the next bit I used the coloured white fondant icing to cover the cakes to give a smooth surface.
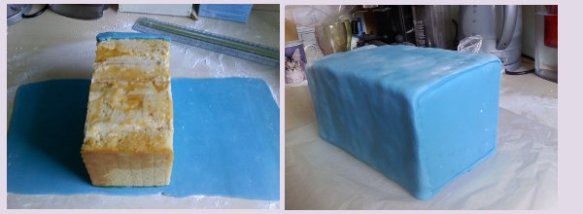 Finally I covered a 6 inch square thick cake board with the ready coloured fondant. After this is the difficult bit – leaving everything to dry out for a whole day.
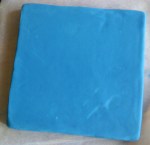
The following day I made some rice paper windows (using the flash card as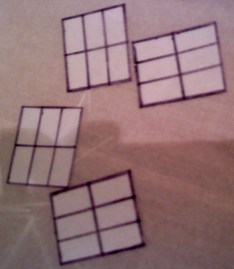 a template) and used an edible colour pen to mark out the panes. I stuck these onto the side panels using a tube of ready-made icing.
Then I mixed up some royal icing, coloured it blue and used it to stick the cake to the board then the four side panels on to the sides of the cake.
As you can see there were a few gaps which I filled with royal icing. If the cake had been more precisely cut, then this wouldn’t have happened.
The roof was made with more cake, first one slightly larger than the cake and another smaller one. They were attached then covered in blue fondant.
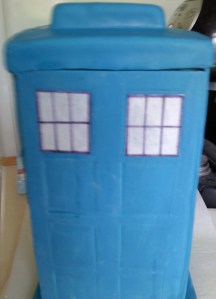
I made the light for the top using two midget gems stuck together with blue icing top and bottom and black icing from a tube to make it look like a lamp. It wasn’t that successful but looked alright from a distance. I would love to have made it really light up but didn’t know how.
I cut some thin strips of icing to hide the gap between the roof and the main part and also to give somewhere to stick the ‘Police Box’ signs. These were copied from a Tardis picture and sized to fit, so was the door sign and the St Johns Ambulance sign. I really wanted to make these from rice paper too but they were impossible to draw properly, so they are paper and ink. I always like to make my cakes completely edible, but it was impossible. I would really love to have one of those edible ink printers but I don’t make enough cakes to justify the price.
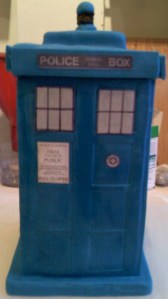
Once everything was attached, the Tardis was complete!
I used left over bits of cake on a large square cake board to make rocks, to give the Tardis somewhere to stand, as if it had just materialised on a strange planet.
I tried the Tardis cake in place to make sure it would fit on the board then covered the cake ‘rocks’ with white fondant given a marble d effect with black food colouring, then brushed with edible glitter.
The Tardis was placed on the board and the cake was finally completed.

What the cake needed was some form of support to keep the tower of cake from collapsing. You can use dowels but I don’t like using inedible components unless really necessary. After researching I’ve decided that if I do this again I would use thin sticks of rock to hold the cake together. They are edible and strong so should do the job well.
So that is the end of the story. The cake was eaten and it tasted good, there’s no point in making a cake if you can’t eat it! It should be possible to use any flavour of cake to make the Tardis, even chocolate as there is so much icing, no colour will show through, any cake except a fatless sponge would work, as long as it is able to be cut into shape without falling to bits.
If anyone has any suggestions on how to make novelty cakes easier, or you have made a Tardis cake yourself, I would love to hear from you.



Hi Helen, firstly, great blog it was just what I needed 😀 I’m just about to tempt my first novelty cake, being the tardis because I love to jump in the at the deep end. While planning this cake, Tardis blue – omg where do I get it, you said in the blog that you found it, How do you fancy sharing this knowledge with me. Many thanks Nick
I got the icing for this cake from a small cake supplies company. I can’t remember what colour it was though. I have n fact just made another Tardis cake, and I used Navy Blue from Regalice. If you notice the Tardis has changed colour over the years. I think the nearest to the colour I used for this cake is Atlantic Blue. Hope this heips. Regalice is available in most large supermarkets and I’m sure you can get it online.
Thanks Helen 🙂 I’ll have a look 🙂